To make a 42-volt charger, gather a transformer, a bridge rectifier, and capacitors. Connect the transformer to the bridge rectifier to convert AC to DC.
Add capacitors to smooth the output and regulate the voltage. Keep the circuitry safe by using proper insulation and following safety guidelines. Creating a 42-volt charger requires a few key components and a basic understanding of circuitry. By following the necessary steps and precautions, you can build a reliable charger to power your 42-volt devices.
In this guide, we will detail the process of making a 42-volt charger using easily accessible materials and straightforward techniques. Whether you are a hobbyist or a DIY enthusiast, this tutorial will provide you with the essential knowledge to construct a functional 42-volt charger for your specific needs.
Understanding 42 Volt Chargers
Importance And Uses Of 42v Chargers
42 volt chargers play a vital role in powering various electronic devices such as electric bicycles, scooters, and power tools. Their importance lies in efficiently charging and maintaining the battery voltage of these high-power devices, ensuring optimal performance and longer battery life.
Here are some of the key uses and significance of 42V chargers:
- Charging electric bicycles and scooters
- Powering high-voltage power tools
- Maintaining battery voltage for optimal performance
Differences Between 42v And Standard Chargers
When comparing 42V chargers to standard ones, several notable differences become apparent. While standard chargers are designed for lower voltage electronic devices, 42V chargers are specifically tailored to meet the higher voltage and power demands of electric bicycles, scooters, and power tools.
Some key distinctions between 42V and standard chargers include:
- Higher voltage output for 42V chargers
- Specialized design for high-power electronic devices
- Enhanced safety features to handle increased power levels
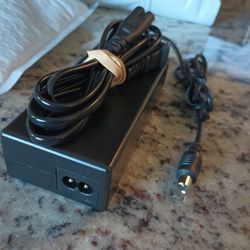
Credit: offerup.com
Planning Your 42 Volt Charger Project
When you embark on a project to make a 42 volt charger, it’s crucial to carefully plan out the process to ensure safety and efficiency. This entails understanding the essential components and tools required, as well as implementing safety precautions during assembly. Let’s delve into the key aspects of planning your 42 volt charger project.
Essential Components And Tools
Before diving in headfirst, it’s essential to have a clear understanding of the vital components and tools necessary for constructing a 42 volt charger. Here’s a breakdown of the key elements:
- Transformer: A high-quality transformer capable of handling the 42 volt output.
- Rectifier: An efficient rectifier to convert AC power to DC power for charging.
- Filter Capacitor: A filter capacitor to smoothen the DC output and minimize ripples.
- Resistors and Diodes: These are crucial for regulating and protecting the charging circuit.
- Meter: An analog or digital meter to monitor voltage and current during the charging process.
- Enclosure: A well-ventilated and insulated enclosure to house the components and ensure safety.
Additionally, you’ll need a set of tools including soldering iron, wire cutters, multimeter, and safety gear such as gloves and safety goggles for handling electrical components.
Safety Precautions During Assembly
Safety should be a top priority when assembling a 42 volt charger. Here are some critical safety measures to adhere to:
- Power Off: Always ensure the power source is switched off and unplugged before handling any components to prevent electrical hazards.
- Insulation: Use insulated tools and double-check all connections to prevent short circuits and electrical shocks.
- Proper Ventilation: Work in a well-ventilated area when soldering and assembling components to avoid inhaling harmful fumes.
- Double-Check Connections: Verify all connections and polarities before applying power to the charger to prevent potential damage to the components.
Crafting A 42 Volt Charger
If you are looking to craft a 42 Volt charger, you have come to the right place. Crafting your own charger can be a rewarding project, and it’s a great way to ensure that you have a charger that meets your specific needs. In this guide, we will take you through a step-by-step process to build your own 42 Volt charger, along with a circuit diagram and component connections. Let’s dive into the details and get started!
Step-by-step Guide To The Assembly Process
Follow these step-by-step instructions to successfully assemble your 42 Volt charger:
- Start by gathering all the necessary components for the charger assembly.
- Assemble the individual components as per the circuit diagram provided.
- Connect the components based on the schematic, ensuring proper polarity and secure connections.
- Double-check all connections and secure them to avoid any loose wiring.
- Test the charger with a suitable load to ensure it is functioning correctly.
- Once verified, encase the circuit in a suitable housing for safety and protection.
Circuit Diagram And Component Connections
Below is a simple circuit diagram for a 42 Volt charger along with the necessary component connections.
| Component | Connection |
|---|---|
| Battery | Positive and negative terminals to respective input connections |
| Rectifier | Connect AC input to the rectifier input |
| Transformer | Connect primary and secondary windings as per the provided specifications |
| Filter Capacitor | Connect across the output of the rectifier for smoothing the DC output |
| Regulator | Connect output of the filter capacitor to the input of the regulator |
Testing Your Diy 42 Volt Charger
Testing Your DIY 42 Volt Charger is an essential step to ensure its safety and functionality. Proper testing will help identify any issues and ensure that the charger is operating correctly, providing you with reliable power for your devices. In this section, we will discuss the methods for safely testing the charger and troubleshooting common issues that may arise.
Methods To Safely Test The Charger
Before testing the charger, ensure that all connections are secure and there are no visible signs of damage to the components. It’s important to follow safety precautions to prevent electrical hazards and potential damage to the charger or the devices it powers. Here are some methods to safely test your DIY 42 Volt Charger:
- Check the voltage output using a multimeter to verify that it is delivering the intended 42 volts.
- Connect the charger to a compatible device and monitor its charging behavior to ensure it is functioning as expected.
- Inspect the temperature of the charger during operation to ensure it does not overheat or pose a fire risk.
- Conduct a short-circuit test to verify that the charger can handle unexpected power surges without malfunctioning.
Troubleshooting Common Issues
If you encounter any problems during testing, it’s important to troubleshoot the charger to identify and resolve any issues. Here are some common issues and their troubleshooting steps:
- Low voltage output: Check the wiring connections and components for any loose connections or damage. Ensure that the power source is providing sufficient input voltage to the charger.
- Overheating: Check for any obstructions to the charger’s cooling system or inadequate ventilation. Inspect the internal components for signs of damage or malfunction that may be causing the overheating.
- Inconsistent charging: Verify that the charging circuitry is functioning properly and check for any loose connections that may be interrupting the charging process. Test the charger with different devices to rule out compatibility issues.
Optimizing Charger Performance
When it comes to optimizing the performance of your 42 Volt charger, efficiency, longevity, and safety are crucial factors to consider. By following a few simple tips and implementing regular maintenance, you can ensure that your charger operates at its best, providing reliable and safe charging for your devices.
Tips For Efficient Charging
Efficient charging not only saves time but also helps prolong the lifespan of your devices. Here are some tips to optimize the charging performance of your 42 Volt charger:
- Use a charger with the appropriate voltage and current for your device to ensure efficient power delivery.
- Keep the charging connection clean and free from debris to maintain a consistent flow of power.
- Avoid overcharging your devices as it can lead to decreased battery performance over time.
- Consider using smart charging technology that automatically adjusts the power output based on the device’s needs.
Maintenance For Longevity And Safety
Regular maintenance is essential to ensure the longevity and safety of your 42 Volt charger. Here are some maintenance practices to follow:
- Inspect the charger and cables for any signs of damage or wear and tear, and replace any faulty components immediately.
- Clean the charger and charging ports regularly to prevent dust and dirt from affecting the connection.
- Store the charger in a cool, dry place to avoid exposure to extreme temperatures or moisture.
- Ensure that the charger is disconnected from the power source when not in use to prevent any potential hazards.
Frequently Asked Questions For How To Make A 42 Volt Charger
How Can I Make A 42-volt Charger At Home?
To make a 42-volt charger at home, you will need a transformer, bridge rectifier, and capacitors. Start by connecting the transformer to the bridge rectifier, then connect the bridge rectifier to the capacitors. Finally, connect the capacitors to the battery, and you have your 42-volt charger.
What Safety Precautions Should I Take When Making A 42-volt Charger?
When making a 42-volt charger, it’s essential to prioritize safety. Always wear insulated gloves and safety goggles, work in a well-ventilated area, and double-check all connections. Ensure that you are familiar with handling high voltage and follow proper safety measures at all times.
Can I Use A 42-volt Charger For Different Battery Types?
Yes, a 42-volt charger can be used for various battery types, including lithium-ion, lead-acid, and nickel-metal hydride. However, it’s crucial to ensure that the charger’s voltage and current ratings match the specific requirements of the battery to avoid damage or safety hazards.
Conclusion
To sum up, creating a 42 volt charger is a manageable project with impressive benefits. With the right tools and guidance, anyone can design and construct their own. This power source is efficient and versatile, allowing for various applications. By following these steps, you can enjoy the convenience and cost savings that come with a DIY charger.