Sometimes we need to change the display resolutions on a pc or laptop. In Windows 10, It’s not hard to change the display. If you need to shaper the resolutions in laptop, go to the default option and change the recommended size from a less than the stellar option.
In this article, we discuss how to change the display setting. At first, You have to choose the Icon size and adjust the front which suits you.
In Windows 10, This screen resolution determines how much information Windows can cram onto your computer screen. Changing the goal either contracts everything to pack more stuff on screen or enlarges everything at the expense of the desktop.
Why Change Your Resolution?
Lots of reasons, people can change the resolution. In the vital case, the user who wants to take the experience of retro games in their original resolutions will change the resolution. Some computers for this resolutions many games don’t support.
In other applications, you will get the future feel. In the market, 4K monitor is available, but everyone doesn’t get access to them. If you want to take experience on high resolutions, you can do it. In the perfect situation, No software manipulates the monitor’s quality, and you can see what is happening on the desktop.
You may get another resolution, More real estate, convincing for reading to try out a custom resolution. If you don’t use the method of a high-resolution monitor, you can easily find out the resize the font and icon.
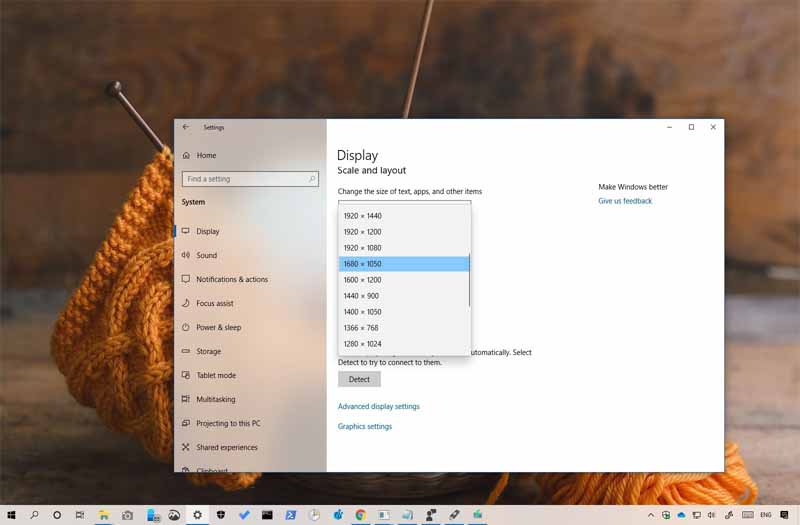
Changing the display setting
- Select the Start button.
- Click the Settings icon and select the System.
- Then have to press Advanced display settings.
- Press on under the Resolution menu.
- Then you get lots of options and Select the option you want.
- Then Apply it.
Resolved to Customize
In Windows 10, there are several options to apply a custom resolution. If you change the resolution, you have to go with the Custom Resolution. Utility grants complete control but may cause a minor issue in some settings, or on the other hand, you can utilize the elements presented by Intel, AMD, and Nvidia. Alter your goal until your heart’s substance.
Cannot change Screen Resolution in Windows 10
The simple reason is the driver’s misconfiguration. Even, Sometimes drivers can’t balance with lower resolutions. So have to update the graphics driver fast.
Know more about: Screen Saver Settings In Windows 10
Update the Graphics Driver
- Firstly, you have to open the device Manager.
- Expand to Display Adapters, and press the CPU.
- Run the driver program, and install it.
- If it’s an INF file, right-click on the CPU, and update the driver.
- It will ask you The location of the INF file.
- Then install it.
If the driver is already updated, you can be rolling the old back driver. Its possible if you have a backup.
Turn on GPU Scaling
If you have the AMD and NVIDIA cards, you can check the GPU scaling option. It allows the scaling image so that the screen vertically and horizontally can fit.
AMD
- Have to Open the settings of your AMD Radeon.
- Press on the Display
- Please find out the GPU Scaling and enable it
NVIDIA
Open the NVIDIA Control Panel, and you will get Here have two options
- a) Change Resolution or Create New Resolution: You can customize the display and keep refreshing in this area. Moreover, You can preview before finalizing. It helps when you know a particular resolution was there.
- b) Adjust Desktop Size: You will get the option full screen, aspect ratio, or no scaling. While it may not show any signs during regular work, you might see noticeable lag when playing a video game.
Read also: DNS Server In Windows 10