To remove the hard drive from an HP Pavilion 15 Laptop, start by unscrewing the back cover and locating the hard drive. Gently lift the hard drive using the Mylar tab and remove it from the computer.
Save the screws for replacement and carefully remove the hard drive from its carrier. For a solid state drive, remove the securing screw first, then pull the drive out and store it in a static dissipative bag. The process of removing a hard drive from an HP Pavilion 15 Laptop involves unscrewing the back cover, carefully lifting and removing the hard drive using the Mylar tab, and saving the screws for replacement.
You can also store the hard drive in a static dissipative bag for protection. Similarly, for a solid state drive, the process involves removing the securing screw, gently pulling the drive out, and storing it in a static dissipative bag.
How To Remove Hard Drive From Hp Pavilion 15 Laptop
Before disassembling your HP Pavilion 15 laptop to remove the hard drive, it’s important to take some preparatory steps. Firstly, ensure you have the required tools for safe removal, including a Phillips-head screwdriver. Make sure to power off the laptop and disconnect any external devices. Once you have prepared the necessary tools and powered off the laptop, you can proceed with the disassembly process. Remove the back cover by unscrewing all the screws and locate the hard drive. Using a Mylar tab, lift the edge of the hard drive and carefully pull it out. Remember to save the screws for hard drive replacement. If you are removing a solid-state drive, unscrew the securing screw and gently pull the drive out, placing it in a static dissipative bag for safety. Following these steps will help you safely remove the hard drive from your HP Pavilion 15 laptop.
First Steps For Safe Disassembly
When removing the hard drive from an HP Pavilion 15 laptop, it’s crucial to follow the proper disassembly steps. Begin by shutting down the laptop properly to avoid any potential data loss or system damage. After shutting down, disconnect the power and peripherals from the laptop to ensure a safe disassembly process. It’s also essential to ground yourself to prevent electrostatic discharge, as this can damage sensitive components. By following these initial steps, you can safely proceed with removing the hard drive from your HP Pavilion 15 laptop.
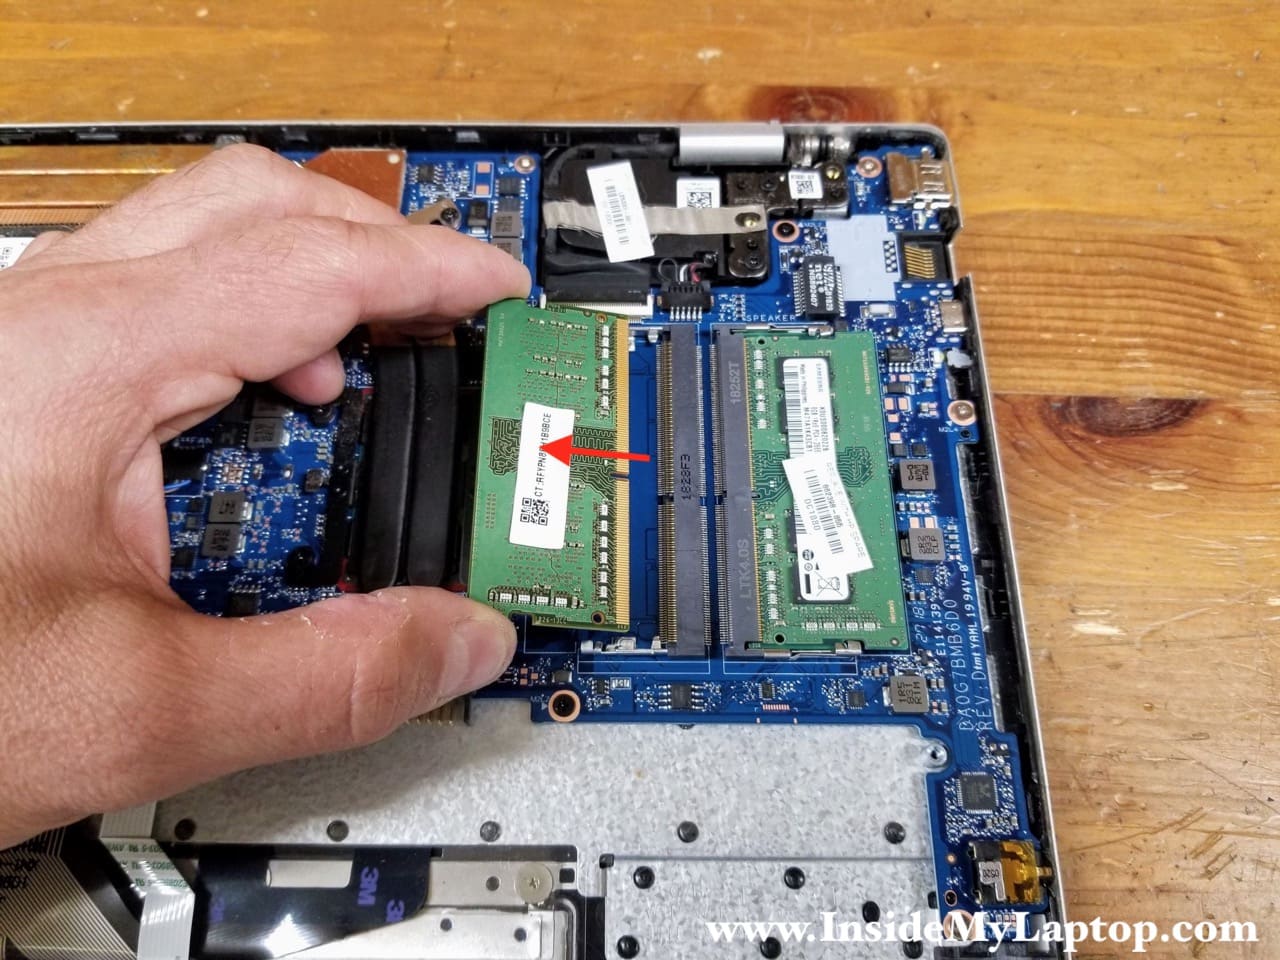
Accessing The Hp Pavilion 15 Hard Drive
Removing the hard drive from an HP Pavilion 15 laptop can be done by following simple steps. Starting with the removal of the back panel, which requires unscrewing all the screws and lifting off the cover, the process then involves locating the hard drive compartment. Once identified, the hard drive can be removed by using the Mylar tab to lift the edge of the drive and pulling it out of the computer. It’s important to save the screws for hard drive replacement. For a solid-state drive, the Phillips-head screw securing the drive to the system board needs to be removed. With gentle pulling, the solid-state drive can be taken out and placed in a static dissipative bag for safekeeping.
Credit: www.insidemylaptop.com
Hard Drive Removal Process
In order to remove the hard drive from an HP Pavilion 15 Laptop, it is important to proceed with caution and follow the necessary steps. Begin by carefully unplugging all cables and connectors attached to the hard drive to avoid any damage. Next, locate and unscrew the hard drive from its bay on the laptop, taking care not to strip the screws. Finally, use any tabs or levers provided to gently release the hard drive from its position. It is crucial to handle the hard drive with care throughout the removal process to prevent any potential damage.
Transferring Data From Old Hard Drive
Before removing the hard drive from your HP Pavilion 15 laptop, it’s essential to consider backing up your data. Ensure that all your important files and documents are safely backed up either onto an external drive or using a cloud-based storage service. When transferring data, you have the option to either clone the entire drive or selectively transfer files to the new storage device. Prioritize data integrity by carefully handling the transition process to avoid any potential data loss or corruption. Double-check your backup to make sure all data is successfully transferred. By taking these considerations into account, you can confidently proceed with removing the hard drive from your HP Pavilion 15 laptop and safeguard your valuable data.
Replacing Hard Drive With Ssd (optional)
Upgrading your HP Pavilion 15 laptop’s hard drive to a SSD can significantly improve its overall performance and speed. Replacing the hard drive with an SSD offers several advantages, including faster data access, reduced boot time, and improved multitasking capabilities. When considering SSD compatibility, it’s essential to factor in the size and type of SSD that is compatible with the Pavilion 15 laptop model. Installing the SSD involves removing the back cover, locating the hard drive or SSD, removing any securing screws, and gently lifting and pulling the drive or SSD out of the laptop. It is then placed in a static dissipative bag for protection.
Final Checks And Reassembly
To perform the final checks and reassembly after removing the hard drive from an HP Pavilion 15 Laptop, carefully lift the hard drive using the Mylar tab and remove it from the carrier after unscrewing it. Use a Phillips-head screwdriver to remove any screws securing the solid state drive, then gently pull it out and place it in a static dissipative bag.
| Before beginning the reassembly process, ensure all connectors are reattached properly to avoid any issues later on. It is crucial to secure the new drive with screws that hold it firmly in place and prevent any movement during operation. Once these steps are completed, carefully replace the back panel and boot up the laptop to ensure that everything is functioning as expected. |
Aftercare And Tips
Removing a hard drive from an HP Pavilion 15 laptop involves unscrewing the back cover and using the Mylar tab to gently lift and remove the drive from the computer. Additionally, saving the screws for hard drive replacement is crucial. Aftercare and tips for this process include updating system drivers if necessary, monitoring laptop performance post-upgrade, and adhering to best practices for maintaining the new drive. These measures will ensure a successful transition and optimal performance for the laptop’s new hard drive.
Frequently Asked Questions For How To Remove Hard Drive From Hp Pavilion 15 Laptop
How Do I Remove The Harddrive From My Hp Pavilion Laptop?
To remove the hard drive from your HP Pavilion laptop, first remove the battery and back cover. Then use the Mylar tab on the hard disk drive to pull it out. Remove the four screws securing the drive to its carrier and lift it out.
For a solid state drive, unscrew and gently remove it.
How Do I Take The Cover Off My Hp Pavilion 15 Laptop?
To remove the cover of your HP Pavilion 15 laptop, first, remove the battery and unscrew all back cover screws. Then use the Mylar tab to lift and pull out the hard drive. For the solid-state drive, unscrew it and gently pull it out.
Does Hp Pavilion 15 Have Hdd?
Yes, the HP Pavilion 15 comes with a hard disk drive (HDD) as part of its standard configuration.
How Do I Remove The Solid State Drive From My Hp Laptop?
To remove the solid state drive from your HP laptop, first, remove the battery and back cover. Use a Phillips-head screwdriver to unscrew it from the system board. Then, gently pull the drive out and place it in a static-free bag.
Conclusion
Removing the hard drive from your HP Pavilion 15 laptop can be a straightforward process if you follow the recommended steps and handle the components carefully. By referring to the manufacturer’s guidelines and using the appropriate tools, you can efficiently replace the hard drive and even consider upgrading to a solid state drive for improved performance.