Are you tired of the same old boring video meetings on Google Meet? It’s time to spice things up and explore the advanced features of this powerful platform. As virtual meetings become increasingly important, one must thoroughly understand the features of Google Meet.
Here are some advanced features we will guide you through step-by-step:
- How To Schedule A Google Meet?
- Add or blur backgrounds in google meet
- Q&A Sessions:
- Change name in google meet
That’s not all. As you read, you will explore more advanced features in our guidelines. Our in-depth tutorial on Google Meet’s advanced features will give you the skills to make a great impression.

Mastering Google Meet: How To Schedule A Google Meet?
Let’s check out different ways to schedule a google to meet:
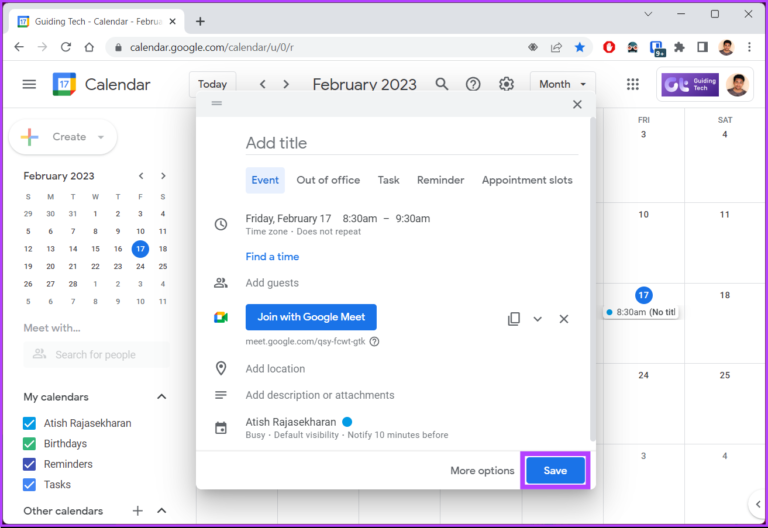
Schedule A Google Meet Using Google Calendar
- Open calendar.google.com in your browser and log in with your Google account.
- Click on the “Create” button in the upper left corner of the screen.

- Select “Event” from the drop-down menu.
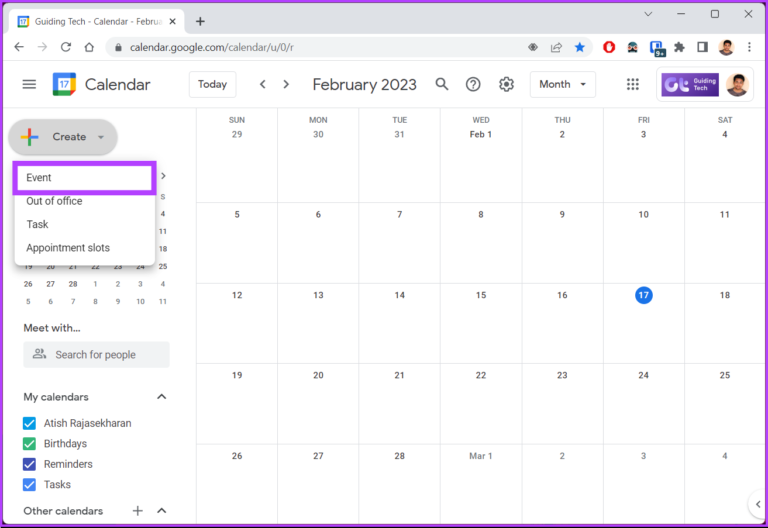
- Add the details about the meeting, such as the title, meeting date, and time.
- Click on “Add Guests” and add the email addresses of the people you want to invite to the meeting.

- Click on “Add Google Meet video conferencing” and then “Save” to create the meeting.
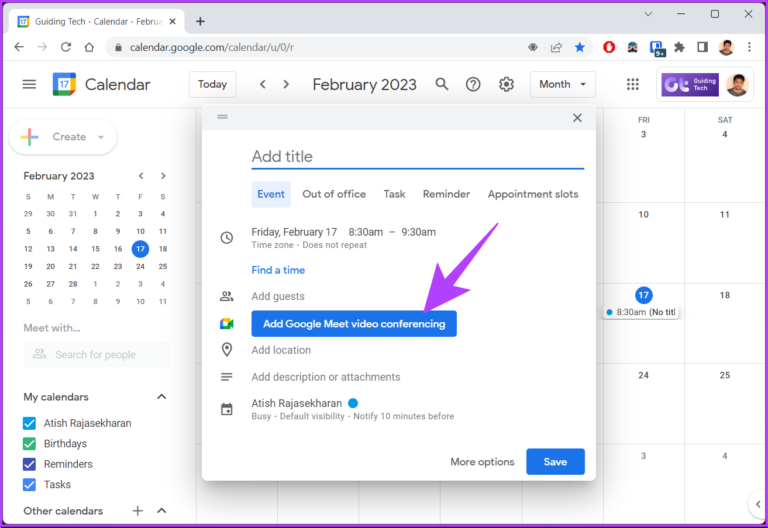
- Click on the “Save” button to save the event.
Schedule A Google Meet Using Gmail.
- Open your Gmail account through mail.google.com and log in with your credentials.
- On the right-hand side of the screen, click on the “Google Meet” icon.

- Click on “New Meeting”.
- From the pop-up, select “Share via email.”

- Enter the participant’s email, then lock the bottom to “Send Icon” and click the arrow beside “Send Icon”.
- Now Select “Schedule send.”

- Now from the pop-up, Click on “Pick date & time.”

- Now enter your desired date & time and click the “Send” Button on the bottom left corner.
Schedule A Google Meet Using Meet App.
- Open the Google Meet app on your mobile device. If you don’t have it installed, you can download it. You can get it from the Google Play Store for Android devices or the App Store for iOS devices.
- Once the app is open, tap the “New” button on the screen’s bottom.
- You will have various options for scheduling or hosting a meeting from here. Select “Schedule in Google Calendar”
- Fill in all the details for the meeting, including the name, date, and time. You can add guests by entering their email addresses or choosing them from your contacts.

Once you have filled in all the details, click the “Save” button. This will add a Google Meet link to your event, which you can share with your guests.
How To Show Or Hide Google Meet In Gmail (For All Users)?
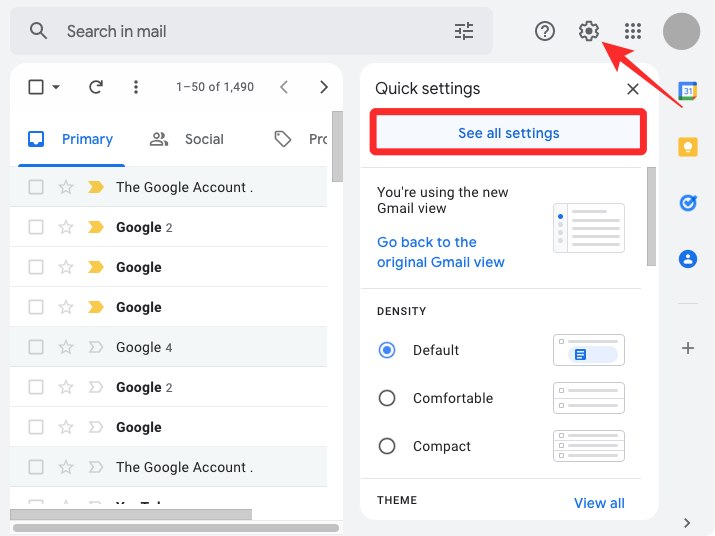
- Go to Gmail and click the Settings button at the top-right corner.
- From the drop-down menu, select “See all settings.”
- Choose the “Chat and Meet” option from the top menu bar.

- In the “Meet” section, make the changes you desire.
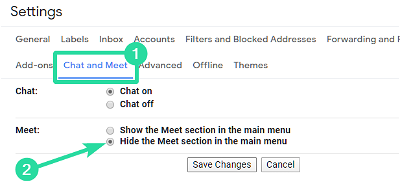
- Once you have made your changes, scroll to the bottom and click “Save Changes.”
How To Add Or Blur Backgrounds In Google Meet?
Here are the step-by-step process of adding or blurring the background and using a filter:
- Click on the three dots in the bottom right-hand corner during a meeting
- Select “Apply visual effects.”
- To blur your background completely, click on “Blur your background.” For a slight blur, select “Slightly blur your background.”
- If you want to use a pre-uploaded background, click the background.
- To use your image as a background, click “Upload a background image.”
- If you want to add a style to your video, click a style.
- To use a filter, click “Filters” at the bottom and choose your desired filter.
How To Change Names In Google Meets?
Procedure to change names from Laptop or Desktop through browsers:
- Sign in to your Google account with your credential.
- Open Google Meet through the following links.
- Click on your profile picture in the upper right corner of the website or tap on your profile picture in the app.
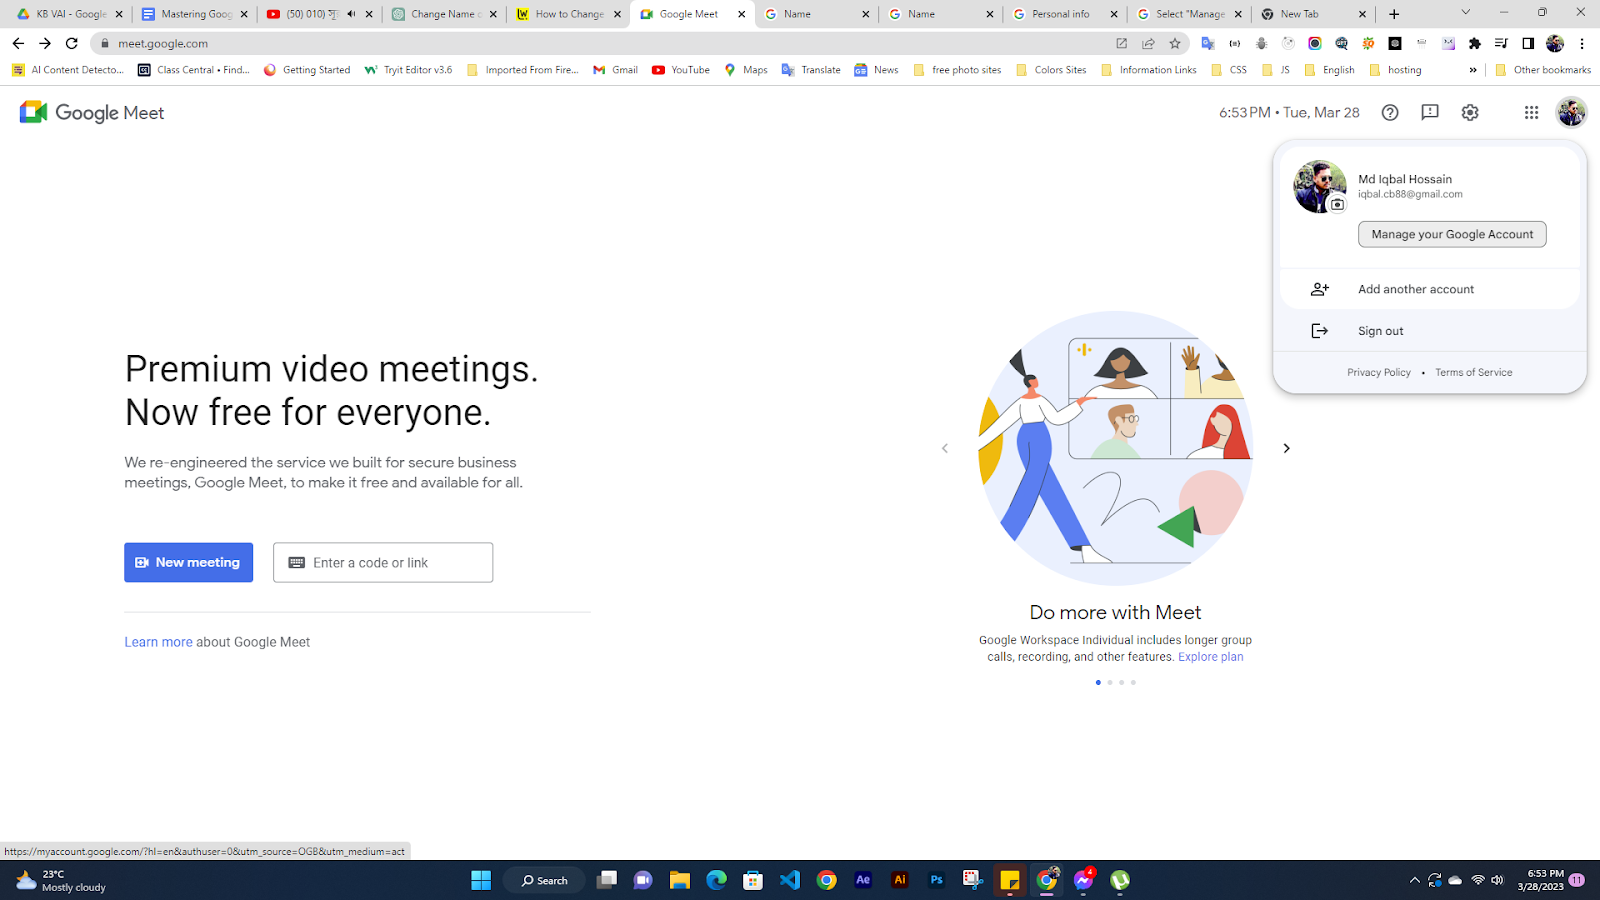
- Select “Manage your Google Account” or “Manage your account” (depending on the version of Meet you are using).
- Go to the “Personal Info” tab.
:max_bytes(150000):strip_icc():format(webp)/A2-ChangeYourNameonGoogleMeet-annotated-3037f07f49dd42adbd23b07eb1b0ad5f.jpg)
- Click on “Name” from “Basic Info”.

- Click the pen icon beside the Name tab to change the first or last names.

- Enter your new first and last name in the fields provided.
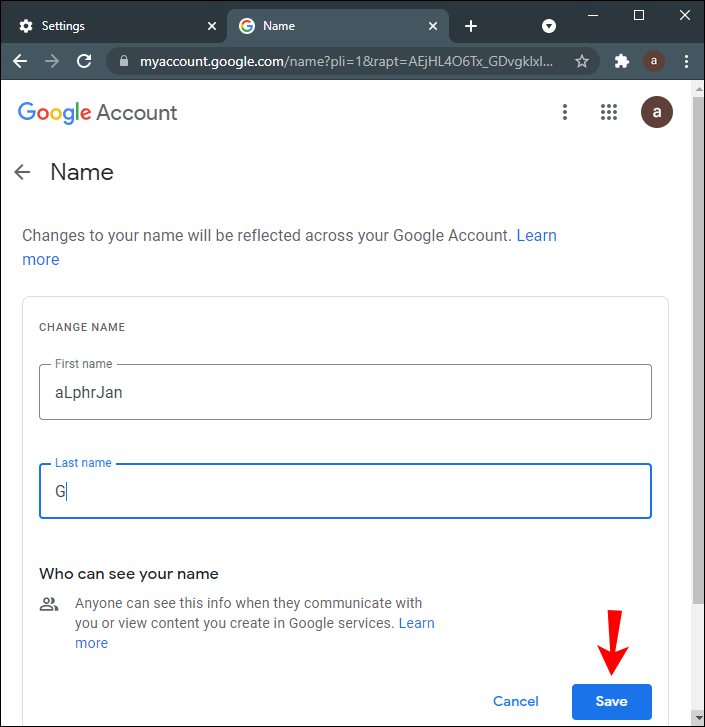
- Click the “Save” button to save your changes.
How To See Everyone On Google Meets?
If you want to see everyone in your Google Meet video conference, you can change the layout to show up to 49 people simultaneously. Here’s how to do it step by step:
Join the Google Meet video conference from your computer.
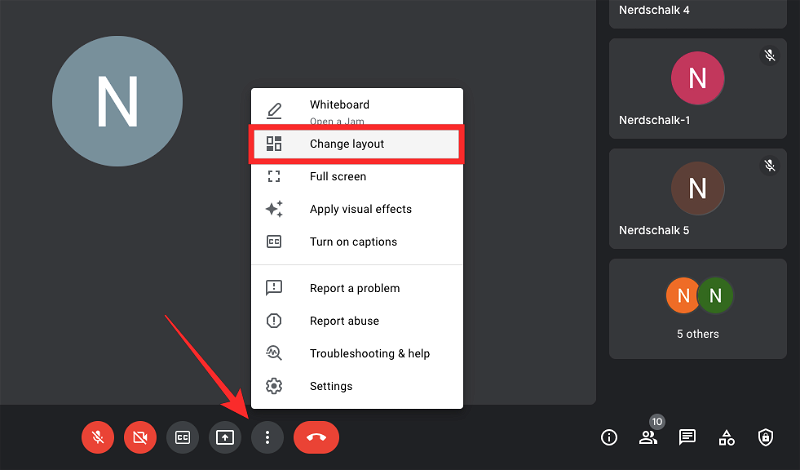
- At the bottom of the screen, click on “More” three dots) icon to open the “Customize and control Google Meet” menu.
- From the dropdown menu, select “Change layout.
3. You will see four options: Auto, Tiled, Spotlight, and Sidebar.
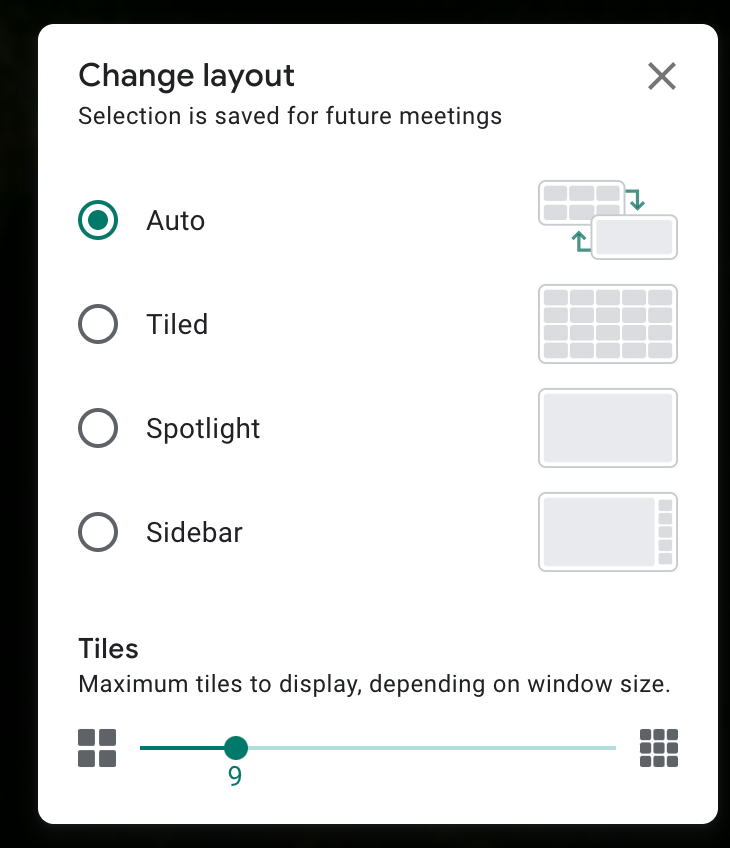
4. Select the “Tiled” option to see up to 49 participants on the same screen.
5. By default, you will see 16 tiles on your screen. Move the slider at the bottom of the screen to increase or decrease the tiles.
6. Once you’ve selected the number of tiles you want to see, click on anywhere outside the popup your settings will automatically be saved.
7. The selected layout will become the default for all future Google Meet video conferences you join until you change it again.
Using the Tiled layout, you can now see everyone in your Google Meet video conference.
How To Send A Google Meet Invite?
There are several ways you can send a google meet invite. Here are some steps to follow:
Invite people to the meeting:
- Tap/Click the “Show everyone.”
- Now click on the “add people” Icon and enter the participants’ email addresses.
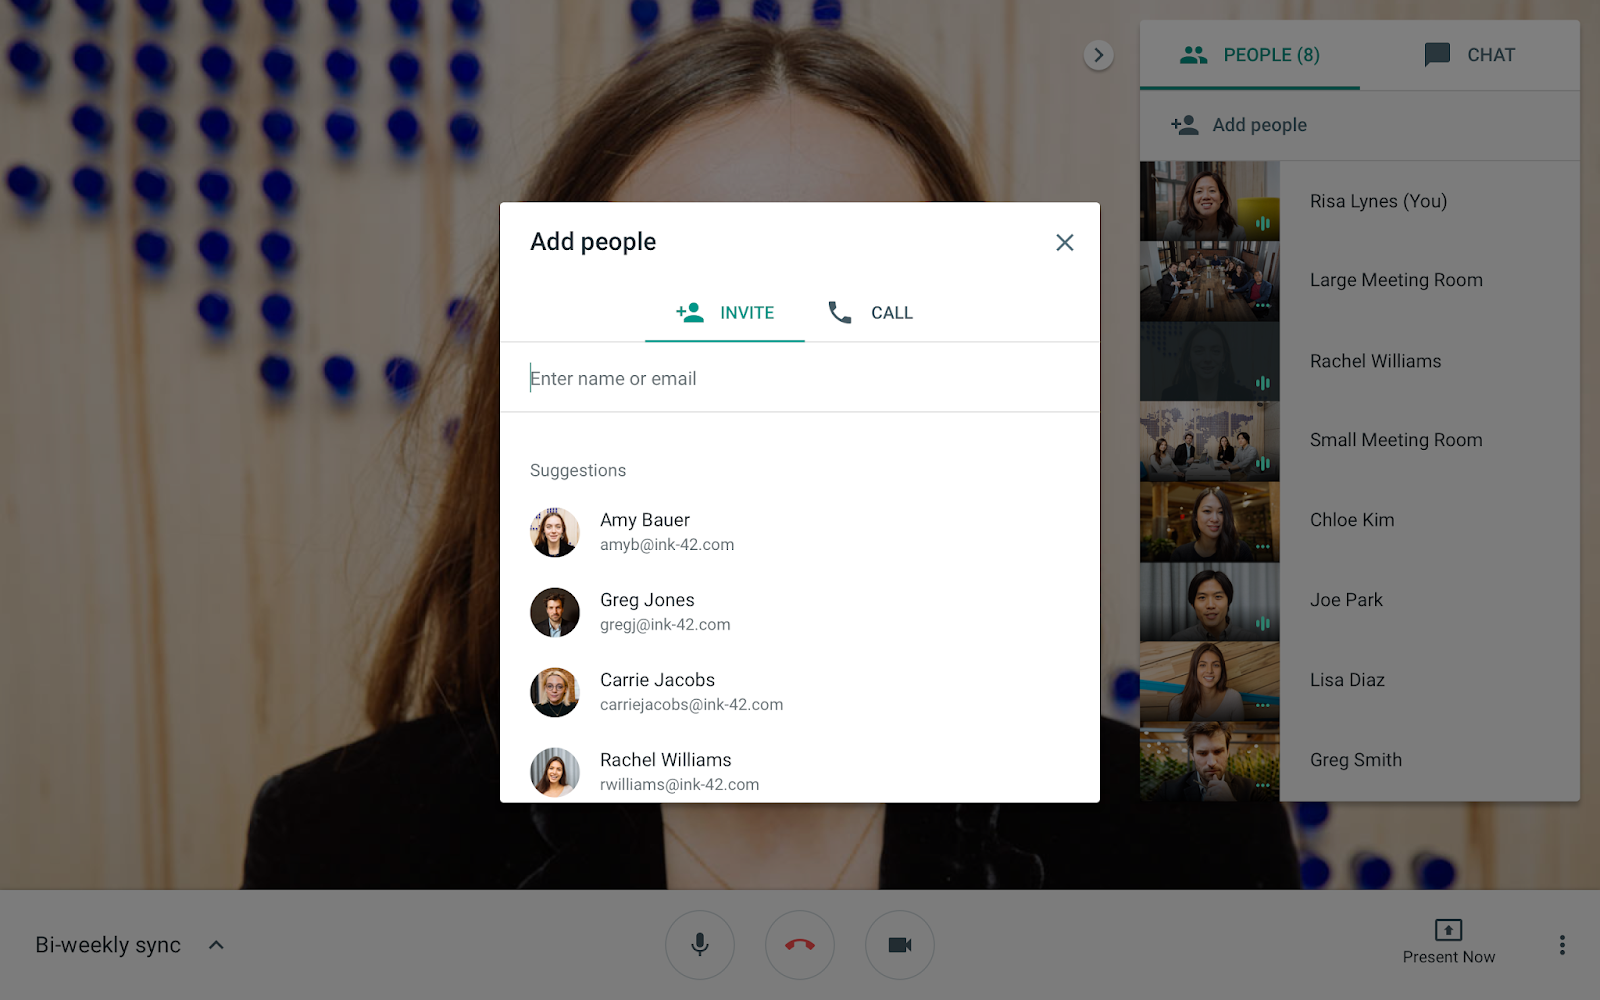
- Tap “Send” to invite them to the calendar event.
How To Share Screen On Google Meet Using Phone?
Here are some steps to share your phone screen on Google Meet:
1. Open the Google Meet app on your mobile phone and join a meeting. Once you’re in the meeting, tap the three-dot menu in the bottom right corner of the screen to access the options.
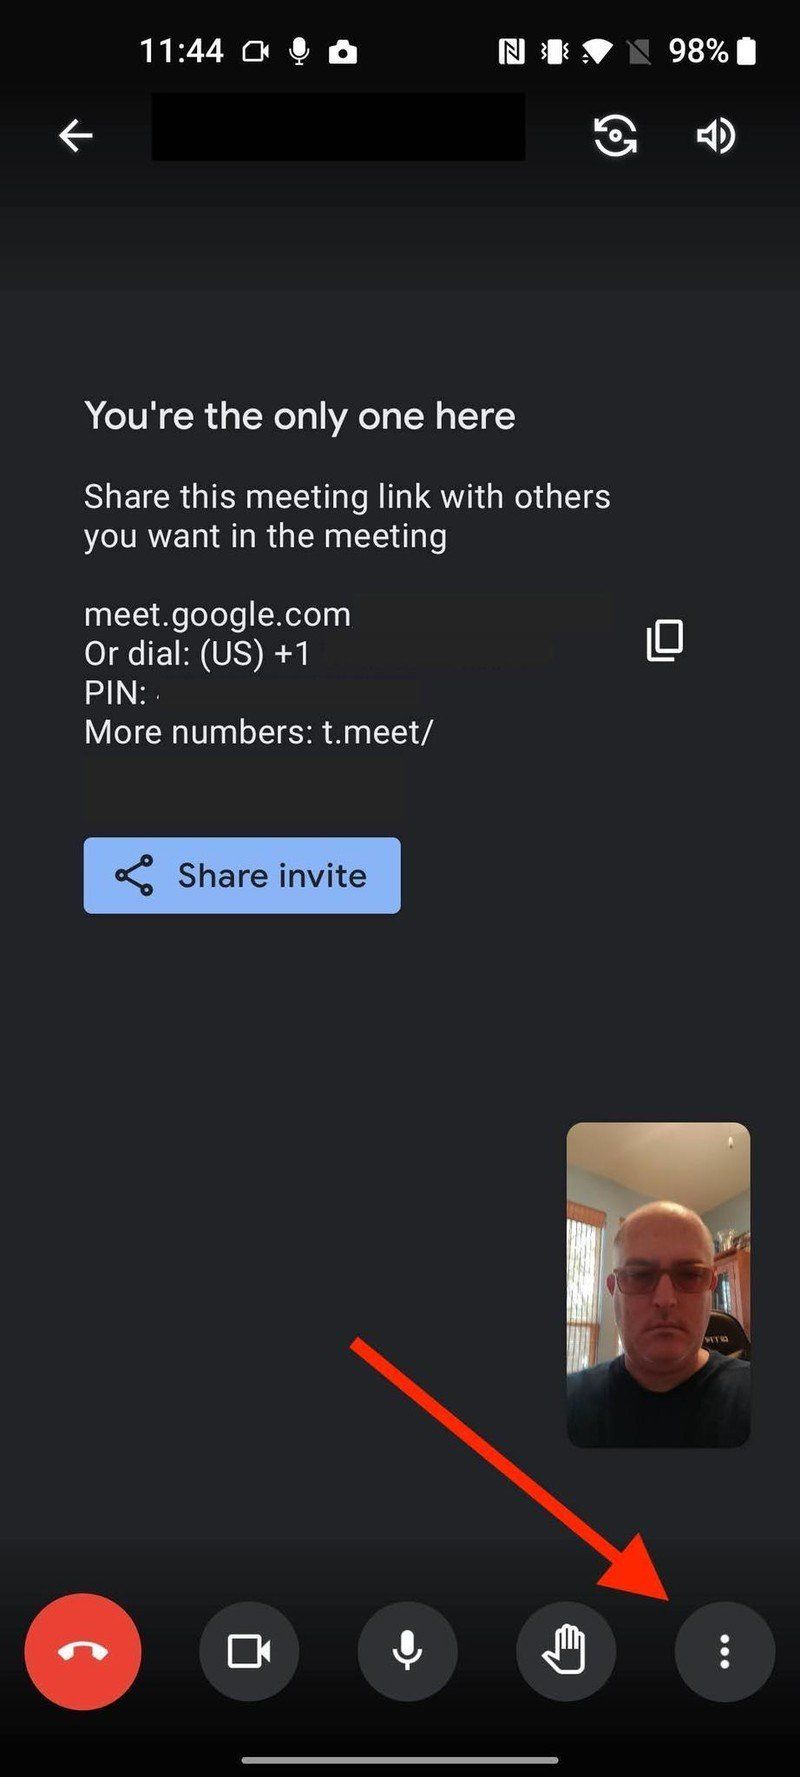
2. Select “Share screen” from the options. This will display the screen-sharing options.
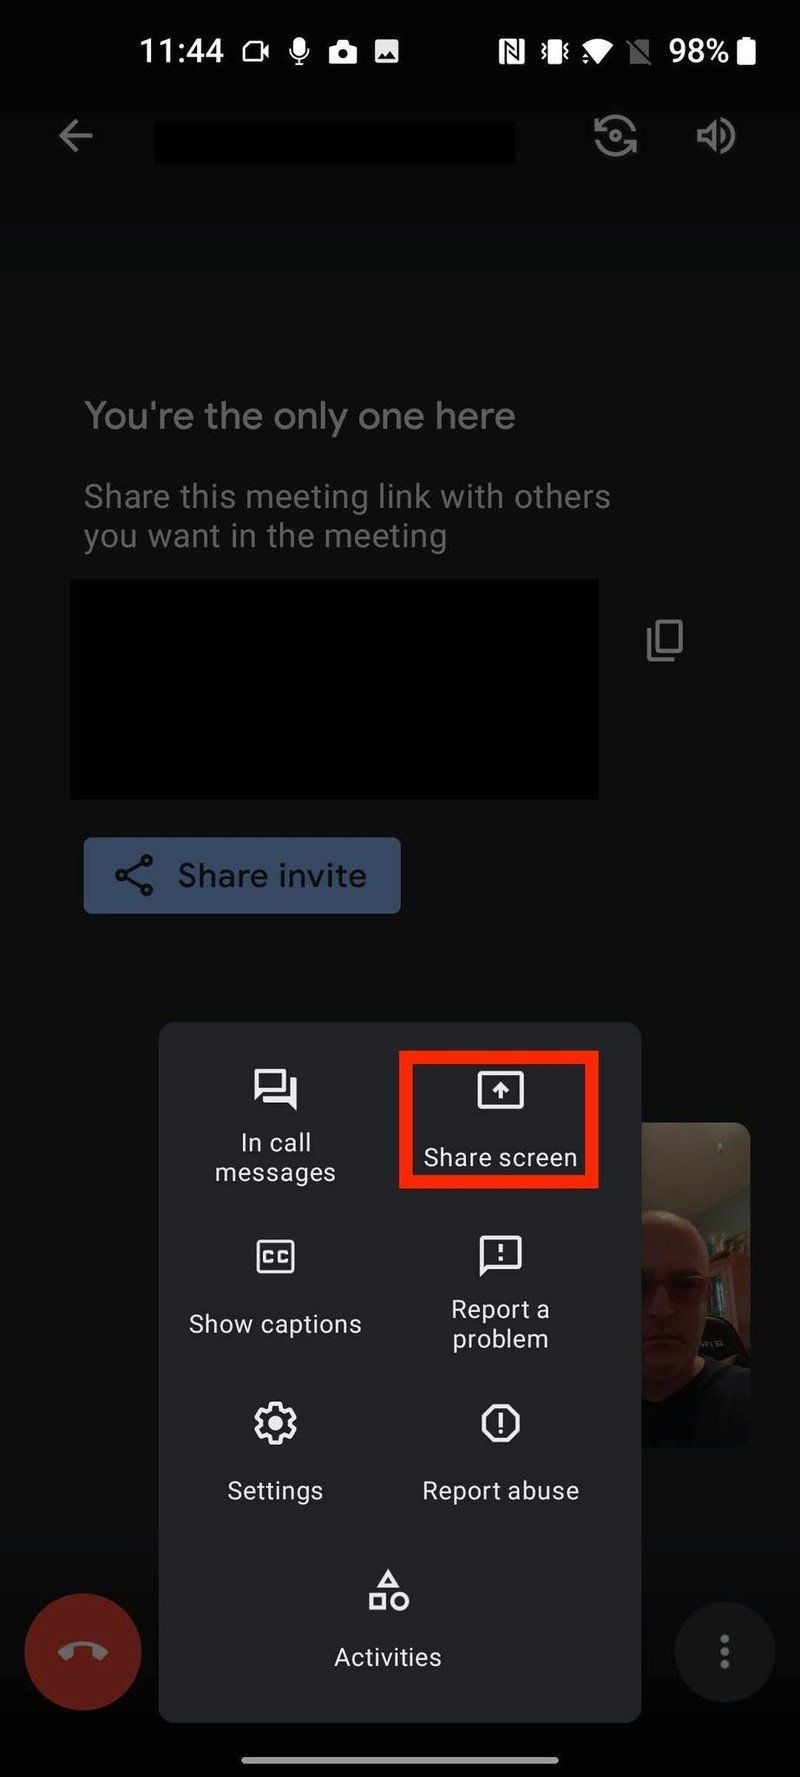
3. To share your entire phone screen, tap “Start Sharing” on Android and tap “Start Broadcasting” on iPhone.
4. To stop sharing on android devices or stop broadcasting on iPhones, just “tap Stop sharing and then Ok”.
How To Create Polls In Google Meet?
- Click on the “Activities ” button in the bottom right-hand corner during a meeting
- Click “Polls”
- Click “Start a poll.”
- Enter your poll question and answer choices
- You have two options:
- If you’re ready to share your poll now, click the “Launch” button.
- Alternatively, if you’d like to save your poll and share it later, simply click the “Save” button.
How To Open Q&A Sessions In Google Meet?
Click on the “Activities ” button in the bottom right-hand corner during a meeting:
- Select “Questions”
- Now, at the bottom right, click “Ask a question”.
- Write your question and click “Post. ” If you want to ask questions anonymously, check this option “Post Anonymously.”
- Participants can submit, upvote, and see the most popular questions.
- The host can answer questions or designate a co-host to answer them.
Frequently Asked Questions
What Are The Features Of Google Meet?
With a Google Account, you can create a video meeting and invite up to 100 people for free. The meetings can last up to 60 minutes. You’ll need to pay for a plan if you want more advanced features like recording, live streaming, and more control options.
These plans also offer international dial-in numbers for participants outside of your country.
What Is The Highest Quality Of Google Meet?
Google Meet has two options for video quality: High Definition (HD) and Standard Definition (SD). HD provides better picture quality with 720 pixels but requires a computer with a powerful processor. SD is lower quality with 360 pixels but uses fewer data.
Is Google Meet safer than Zoom?
Google Meet is considered safer than Zoom because it encrypts messages during transmission. However, it doesn’t use end-to-end encryption. That means the messages are only encrypted between your device and Google’s servers.
So, while your messages are protected, they are not completely secure from potential breaches or unauthorized access.
End Note
With our guidelines, you can easily master the advanced features of Google Meet. Now you can make your meetings more engaging and productive. For instance, you can easily schedule a meeting on a specific date by learning how to schedule a Google Meet.
However, it’s important to remember that mastering Google Meet isn’t just about learning the technical aspects. Meeting etiquette is just as important. Simple things like muting yourself when you’re not speaking or avoiding distractions can make a big difference.
Google Meet is constantly evolving, and new features are being added regularly. You can continue to enhance your virtual meetings by keeping up with updates.